What You Need
~1-2 L, XL, or XXL T-shirts in the same color. Preferably without designs on them if you have them.
~Scissors
~A paper plate
Directions
1. Lay the t-shirt out flat. If there is nothing on the shirt (no designs) then cut all the way up one side and through the sleeve. Open the shirt up with the inside part facing down. Continue at step 3. If there are designs then continue to step 2.
2. Cut up the shirt in a way where you will be able to get the most usable fabric out of it.
3. Place the paper plate over the fabric. Put it as close to the edges as you can. Using the scissors cut around the plate. It doesn't matter how perfect this part is, but try and cut smooth, not a jagged or chopped edge.
4. Now you should have your first circle towards a scarf.
5. Remove the plate, and put the circle in a separate pile from your scrap pile.
6. Put the plate as close to the new edge of fabric as you can. There will be a little "tail" type piece which you will need to cut off.
7. Continue to cut out the rest of the circle, using the plate as a guide.
8. Cut out circles until you run out of fabric. Leave the strip along the hem of the bottom of the shirt for use later on.
9. My size L shirt made 7 circles...I probably could've squeezed one or two out of the top part of the shirt, but I didn't want to.
10. Time to start cutting the circles. You are going to be cutting a spiral in each circle. Start like I have it shown in the photo just above this text. The most important thing here as that you keep each of the strips about the same width so they will all look nice together. Aka don't make "fat" and "skinny" spirals, choose one size and stick with it for each circle.
11. When you come to the end of the spiral it will look like this.
12. Cut just enough off the end to make it the same width as the rest of the scarf. There will be a little fabric left over. Throw it in your scrap pile.
13. Cut out each circle in a spiral shape until all of the circles are done.
14. Pick up one spiral. Hold one end in your left hand and with your right hand slide it down to the other end to stretch it. Repeat for each spiral.
15. Now, put all of the pieces together so you can tie it. Lay the scarf out like it is going to be around your neck and hanging down the front on both sides.
16. Look through your scraps and find several good size pieces which were not used to make into ties. Cut four strips about 5 inches long.
17. Stretch each piece like you did the spirals.
18. Near the middle to top of the scarf find two places on each side to tie off. Tie the second piece a few inches below or above the first one. Tie all of them twice and then cut off the ends that stick out.
 |
| At this point I had not cut off the extra pieces from the ties so you can see how they stick out at odd angles. |
19. Now all that is left is to connect the two sides in the middle.
 |
| See my laptop? I was working on the post as I made the scarf! |
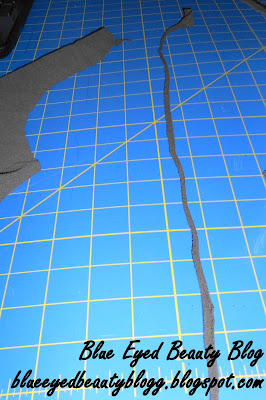
20. Using the piece of the shirt with the hem, cut strips of fabric less than 1/2 an inch wide. Don't worry about the lines being straight. Crooked lines actually look better. I was able to make about 6 strips with my extra fabric.
21. Stretch each of the strips of fabric. They will become pretty long now and that is perfect!
22. Put the scarf around your neck and figure out where you want each side to meet at. Using one of the stretched strips of fabric at a time, tie it around that spot and secure it with a double knot. Repeat for each strip, rotating the knots just a little so it won't matter which way you put the scarf on.
23. I had a little bit of extra fabric left over from my scarf project, but not much! If your shirt has no logo's or writing you will have even less leftover than this!
I hope that this tutorial is helpful to anyone who is going to attempt to make this scarf! It is super easy and it looks cute too!


That looks great! So nice to see a no sew project! Thanks for sharing
ReplyDeleteRebecca
Heronscrafts.blogspot.com
Awwww man this looks TOO complicated for me!!! LOL That t-shirt tho...that you cut up...its SUPER CUTE!!! LOLOLOL!!!
ReplyDeleteMary this is the easiest craft of your life!!! You should totally try it. It's not that hard at all and I wrote out a lot of stuff so it would be easy to follow. :)
DeleteHelen
Okaaaaay...I'm gonna try it!!! LOL!
ReplyDeleteYay!! post a pic when you get it done so I can come see it!
DeleteHelen
I have t-shirts, paperplates, and scissors ~ definitely trying this!
ReplyDelete