Showing posts with label Seasons: Winter. Show all posts

Monday, January 6, 2014

Date Night | Coffee & Scrabble


I don’t know if you’re a scrabble fan or not, but I sure am! I could play it all the time, but usually I don’t have anyone to play it with and hubby only likes to play on occasion. 


With this awful cold weather it is the perfect time to pull out the Scrabble board (or another favorite board game!), fix yourself a fancy cup of coffee (or buy one from McDonalds!) and start playing!


Grab your board game, a piece of paper and pen/pencil to keep score, a dictionary (or two!), and your coffee. If you already play scrabble you know the rules, if not you can always Google them… but here’s the basic idea: It’s pretty easy. You start with a word crossing over the star and then you add words to it as it is your turn. Words have to have a space between them, and if you’re not sure something is a word or not use the dictionary to look it up and double check (but you can’t use the dictionary to look for words to add to the board!). When you run out of tiles to use or there are no more places to add words the game is over. Blank tiles can be used as any letter.

Friday, December 27, 2013

Cooking For 2 | Snowflake Biscuits


One year I was making biscuits during the winter and thought it would be fun to use a snowflake cookie cutter. They turned out super cute and were a huge hit! I use this biscuit recipe all the time, but the only difference between these and regular biscuits is the shape.


In case you’re wondering, the photo is from another time when I made a mass amount of these biscuits, but this recipe is for 2-3 people.

This recipe makes 8-10 snowflake biscuits.

Ingredients
2 cups white flour
1 Tablespoon baking powder
2 Tablespoons sugar
1/2 teaspoon cream of tarter
1/2 cup shortening
2/3 cup milk or buttermilk

Directions
1. Preheat the oven to 450 degrees.
2. In a bowl mix together flour, baking powder, sugar, and cream of tarter.
3. Using a fork, cut in the shortening until the mixture has coarse ‘crumbs’.
4. Make a well in the center of the ingredients, stir in the milk.
5. Lightly flour a surface. Dump the dough onto it and knead the dough by folding and pressing the dough 10 or 12 times until it’s smooth.
6. Roll the dough out to ½ inch thick.
7. Dip a snowflake cookie cutter in flour and start cutting out biscuits. Place in a greased glass baking dish.
8. Bake the biscuits for 10 to 12 minutes or until golden.
9. Remove biscuits from pan and serve hot with butter.

Monday, December 23, 2013

First Big Snow of Winter 2013

These bushes are past knee high.
They had close to a foot of snow on top of them.

The first week of December brought a massive ice & snow storm to our area. I don’t think I've ever seen so much snow in my whole life! It was crazy. I’m from Oklahoma so the ice everywhere wasn't exactly a new thing (and actually made me not miss OK so much) but all the snow everywhere was crazy!


Most of our back yard was knee deep and the drifts were past that in a few areas. Over a week after the storm hit we still have most of the snow on the ground. It’s all white and pretty!


Our car does not love this weather. It got stuck the first three days hubby had to go out for work. The day of the storm he was able to get the car out of the driveway without too much trouble, but when he got home from his shift it got stuck really bad at the road end of our driveway. We attempted to dig it out, but 30 minutes in we were still getting nowhere. If the guy in the big truck hadn't come and yanked us out it probably would've taken a few hours to dig it out. Thank God for him!!

All bundled up and ready to dig the car out!

Hubby is not used to so much snow. He’s from the deep south and there really isn't snow there… ever. We are both quite tired of it though. Since the original snow storm it’s snowed two times and we had rain/sleet another day. More snow is expected in the next few days. Fortunately the highway right outside our house is a main snow route so it gets plowed regular which is a good thing. I’m just hoping this baby decides to come on a day when the roads are clear! I cannot imagine going all the way to the hospital (over an hour away) on icy roads!

Saturday, December 21, 2013

Christmas Gift | Movie, Popcorn & Hot Chocolate


Earlier this month I shared a post on 10+ Unique & Different Gift Ideas. The $10 Redbox movie gift gave me the idea to shop the $5 movie bin at Walmart to find gifts for my nieces and nephews. They all love movies and because they’re pretty thin and light shipping them was a breeze vs. the bigger bulky gifts we got them last year.

Each movie we wrapped had two packages of popcorn and a package of hot chocolate.

Black Friday leftover promo sales on movies (at Walmart) really helped out too (so keep that in mind for next year!). We got several newer movies (like the new Ice Age 4 and Despicable Me) for $2 and $4 vs. their regular prices ranging from $10-$18!

We picked up the movie Underdog for my nephew T.

Of course I did have to get a few movies from the $5 bin, but in all honesty it really wasn't that expensive when you consider how much you could spend on gifts for people!

Make This Gift
A DVD
2 packages of popcorn (I chose Extra Butter)
1-2 packages of hot chocolate

Directions
1. Make your movie selection for each person you’ll be gifting this to.
2. Open the hot chocolate box and popcorn box and remove the packages needed for each gift.
3. Wrap the movie. Wrap the hot chocolate and popcorn. (You can use this tutorial I put together last year on wrapping gifts.)
4. Add a bow and a tag and you’re ready to gift it!

Notes
--This gift idea works well if you’re going to do this for multiple people. I did 4 gifts with a box of 8 packages of popcorn so it all got used up. I could have doubled up on the hot chocolate too, but didn't because I needed a few packages for another gift I was putting together.

--If you don’t want to spend money on hot chocolate and popcorn you could always get a $1 bag/box of candy to include with the movie (I did this for one of the little kids since they were too small for hot chocolate and definitely too small for popcorn).

Thursday, December 19, 2013

Christmas 2013 | Hang Christmas Lights

You can see our tree in the font window!

One thing I wanted to do this year was hang multi-color lights on our house. I didn't think we were going to be able to do that since we couldn't buy new lights for the house. Well, hubby was looking in the basement and came across a few strands of multi-color lights that had been left behind. Granted they weren't the icicle lights like I had originally wanted, but once we got these up on the house I actually liked the plain straight strands better!

Notice Demi in the background checking out the lights?

After Hubby checked the lights to make sure they actually worked, I spent a few hours going through the strands changing out the burned out bulbs until everything was lit up. All four of the colored strands were working by the time I was done. And I had black hands because they were so dusty!


Hubby spent a good chunk of his day off on the roof putting the lights up. I did have to buy a package of gutter clips for the lights, but that wasn't bad considering they were only $3. I didn't think we'd have enough lights to cover the front of the house, but as it turned out we had more than enough to go much farther than just the front of the house (as you can see in the first pic).

The footprints are up to our ankles here, and it was still snowing!!

Hubby got the lights up just in time too since the next day we had a big snow storm come through. The lights in the snow look so pretty! I think the whole outcome is fantastic and certainly more than I expected! Hubby did a really good job on our lights. Maybe next year we’ll get a few more strands of the multi-color lights and do the ridge of the roof, over the garage door, and the other side of the flower bed/driveway!

I used the fireworks setting on my camera to take a picture of the house lights at night. I figured that was the best way to capture them since the night setting kept trying to use a flash so you couldn't see what they looked like!

Monday, December 16, 2013

Add Tinsel to a Christmas Gift You're Shipping


Not too long ago I was reading on one of my favorite blogs{Rain on a Tin Roof} with a post on different ways to use tinsel. Not only did she write a post on Ideas for Decorating with Tinsel, but she also shared a few photos of how she used tinsel around her home in the post Christmas Home Tour {Part 1}. It had been a few weeks since I read her decorating ideas post, but when this project was put together I just knew I HAD to share it!

I personally cant use tinsel in my house because we have two cats who are much too curious and like to try and eat things that are long and stringy (tinsel fits in that category). And not only that, but hubby hates tinsel so I will just have to survive with using it to put in boxes of gifts that are shipped off to friends & family!

TO DO
All you have to do is fill a box with the things you're going to ship. "Decorate" with a little tinsel, add packing peanuts to fill in gaps and keep things from moving around, then add some more tinsel! And if you want it to look even cuter put a pretty bow on top!

I think the tinsel and packing peanuts combo in the photo above almost looks like snow, don't you?

So that's how I've used tinsel lately...

what about you?

Saturday, December 14, 2013

Christmas Wreath Refashion


It's been a LONG time since I shared a refashion, but it's also been a long time since I've done any. Well, I did one the first week of December and I'm here to share it! As you can see from the above photos you can see that it was quite a refashion! And the best part is that it was completely free! I had the wreath, the ribions and the red balls already so it was just a matter of a little creativity and work before the wreath was completely remade.


Here is the wreath before the refashion. Not my favorite at all!


My cats, Demi (grey) and Emerald (black), were very interested in the beads.


I fluffed out the greenery and added some gold ribbon.


After adding the red balls I put together the bow and ta da!
We now have a beautiful Christmas wreath on our front door!

Tuesday, December 10, 2013

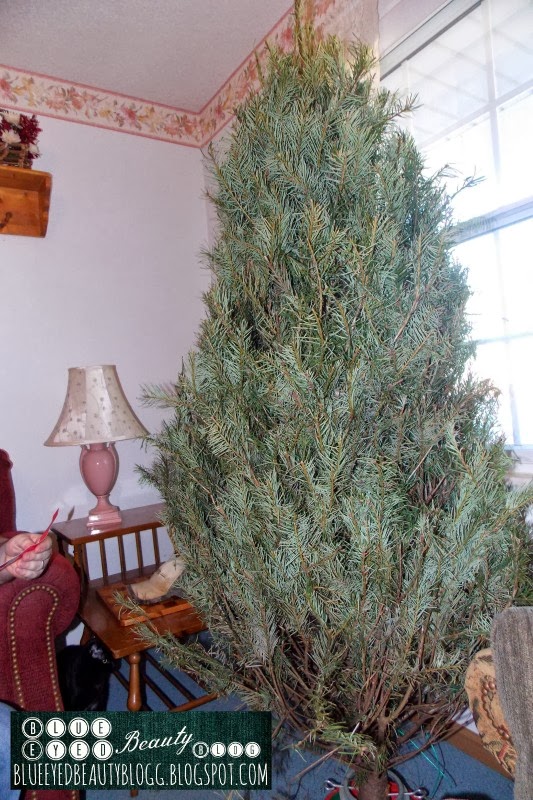
Christmas 2013 | Decorate a Real Tree


Growing up I always had a fake Christmas tree. Hubby, on the other hand, always had a real tree. Because this is our first Christmas as a married couple we wanted to start a new tradition of having a real tree each year. Because we are new to the area I had a hard time finding a tree farm for us to get a tree from so instead we just bought our tree from Walmart. They had a great selection of trees and I’m quite impressed with how beautiful ours has turned out.

If you’re planning on getting a real tree for the first time make sure you have a proper stand for it. You’ll want one that holds water so the tree wont dry up and become a fire hazard. You will also need to buy or borrow a saw or heavy duty limb cutters to cut off the end of the tree so it’s able to start soaking up water. Your tree will need to be watered every day to keep it from drying up. Ours ‘drinks’ about 8 oz. of water each day so I just add another glass of water to the tree stand each morning and so far its doing great!

As you can see, the tree fit pretty good in the back seat!

As I mentioned above, we got our tree from Walmart this year. We have a small 2 door car and weren’t really sure how we were going to get our tree home, but it ended up fitting nicely in the back seat with only a little bit of the top hanging out the passenger window. I will say that I made quite a mess on everything though!

Bringing the tree in the house.

Because the tree was all tied up I thought it wasn’t going to be very big, but I was pleasantly surprised to find it poofed up nicely once the bands were cut. Thank goodness! A small tree would’ve been awful. Autry told me the tree we picked out would be plenty big. He was right.

Notice Demi in the background sniffing the bits that had fallen off the tree.

It took both of us to get the tree in the stand. I held the top while Autry worked on the bottom to make sure it would stay in the stand. Demi was quite interested in the new object in the house.

This was taken right after we untied the tree.
I was a little worried it was going to stay looking like this.
But obviously it didn't, and it looks beautiful now!

The branches took a bit to fall back to where they were supposed to be. I guess it’s a good thing we decorated the tree the day after we bought it. That gave it plenty of time to fluff up. The cats ‘helped’ with the bottom branches. Both of them wouldn’t leave the branches alone so they really fell into their proper place. The cats still mess with the branches, though I try to discourage them from doing so.

I am quite happy with my yard sale ornaments!
Who says new is better anyway?

Pulling out the ornaments was fun. Earlier this fall I found a bunch of ornaments at a yard sale so of course I picked them up since I knew we were going to have a bigger tree than I had previously. We wouldn’t of had enough ornaments if I hadn’t picked up the boxes of glass balls. The red ones are my favorite! Autry pulled out all my Precious Moments ornaments. I haven’t used them in years, but I’m so glad he got them out because I forgot how pretty they are!

Same photo as the first in case you were wondering.

I think our tree turned out quite pretty. We had fun decorating it and I love that it’s simple. No beads, no ribbon. Just some lights and ornaments…and of course a few boxes of candy canes too! Not saying I don’t like trees with beads and ribbon, I’m just not good at putting those things on the tree and Autry doesn't care for them so we just didn't do them.

All the beautifully wrapped presents!
P.S. Check out my How To Gift Wrap A Box tutorial!

The day before we both wrapped the presents we had gotten for each other. Autry took over the living room and I took over the bedroom. I bought the wrapping paper last year in the after Christmas clearance sale and picked out rolls that had the same colors. I thought it the wrapped presents turned out beautifully! And do you remember the thrifted post I did back in September 2012 where I found the lace tree skirt? It adds a nice touch to our tree (though the cats love playing with the ties in the back and that’s frustrating since it never looks like it’s supposed to).

Well that’s all I have on our tree decorating for this year! Having a real tree is a new experience for me. I'd have to say that if your OCD about having clean floors then the falling needles might drive you a bit insane, but they don’t bother me too much. I just vacuum them up every few days and that works just fine for me! :)

Thursday, December 5, 2013

10+ Unique & Different Gift Ideas


So if you've been around the blog awhile you may remember my post from last year on Homemade Christmas Gift Ideas for Boys & Men or the easy and fairly inexpensive DIY Couples Christmas Gift. The DIY Individually Wrapped Hot Chocolate was also popular (I use my own Homemade Hot Chocolate Mix recipe). But if you're new here you haven't seen those posts yet (so be sure to check them out!) and you're ready to see some gift ideas!

This year I am putting together a short list of unique and different gift ideas. Some of these are DIY's and some are store bought or you can purchase them from different Etsy stores (which are all linked in appropriate places), but all of these are awesome ideas for almost anyone who loves Christmas! Many of the ideas have come from my Pinterest Board: Christmas Gift Ideas. I also have another board with gift ideas on it and that is the Pinterest Board: Joy of Giving. I have more there if you like what you see here then you should hop over and check that out too!

{photo via Emily A. Clark}

#1 A unique cook book! This idea comes from Emily A. Clark's post: Gifts for the Ungiftable. I personally would love a new cookbook for Christmas! My sweet little brother got me a Betty Crocker cook book a few years back and I use it ALL the time now (especially since moving to the country and not having instant Pinterest access!). It was a wonderful gift that I never would've thought to ask for or put on my Christmas list. In the post linked Emily shares a few other unique gift ideas too. A few that I liked were the classic book ends and a pretty cutting board.

click image to enlarge & read
{photo via Call Me Cupcake}

#2 Brownie Mix in a Jar! Doesn't this just look delicious?! My mom's theory is people should give gifts that can be made up AFTER the holiday season is over because usually at that time you're too busy finishing up all the desserts from the holidays and the Christmas Cookies people give you that you can't enjoy everything as much. This idea comes from the Swedish blog Call Me Cupcake.

{photo via Thistlewood Farms}

#3 Paint Stick Dominoes! This is a DIY project idea from Thistlewood Farms and I really LOVE it! I think this is one of the most creative ways I've seen to make your own domino set!

{photo via Sweet & Savory Life}

#4 $10 Movies & Snacks Gift! Who doesn't love an easy gift? This idea comes from Sweet & Savory Life. I think it's definitely a great last minute idea for someone you may have forgotten to add to your gift list or for someone who really enjoys watching movies! Check out the Redbox Gift Options. Another idea (which could be a bit more expensive, but still fun) is to hit up the $5 movie bin at Wal-Mart and pick out a few movies the person on your list would enjoy.

{photo via A Simple Kind of Life}

#5 DIY Painted Mousepad! I never would've thought to paint a mouse pad, but this is really neat! If you have a creative person on your gift list you could even make this a kit gift by giving them the items necessary to create this and then let them do their own decorating! This idea comes from the blog: A Simple Kind of Life.

{photo via Eat Sleep Cuddle}

#6 Gold Leaf Notebooks. This is a wonderful gift for the writer on your gift list. I think you could totally use gold spray paint to do this project, but the tutorial on Eat Sleep Cuddle uses paper. Very fun and cute idea and of course you could do shapes (heart on the front of a notebook anyone?) or words like "write" or "create" or "dream". Loving this idea!

{photo via Northern Belle Diaries}

#7 Monogrammed gifts! For those girly girls or college students this is a gift where you can take practically anything and personalize it: notebooks, coffee mugs, coasters, cell phone cases, necklaces, towels, pillow cases, laptop decals....the list could go on.

{photo via Mary Kay}

#8 Mary Kay Satin Hands Kit! When I was a MK beauty consultant in my college days this was one of the items I promoted the most. I had bought the kit for myself and fell in love right away! It makes your hands feel so soft & pretty! This is the perfect gift for a mom who doesn't give herself enough 'me' time. The best thing about this gift? It comes in three different scents: fragrance free, peach, and vanilla sugar! I've tried them all and I have to say peach is for sure my favorite! {Locate a MK beauty consultant near you to purchase this item!}

{photo via Little Lovelies}

#9 Paperclip Bookmarks! For the readers on your Christmas list: they can never have too many bookmarks! I know my hubby is always losing his. These are a little girly, but with some creativity I'm sure you could make some boyish paperclip bookmarks too (if a male on your Christmas list enjoys reading that is!). Another easy DIY bookmark idea is to use some cardboard and fabric scraps to create unique bookmarks. Check out the tutorial at The Sewing Dork.

{photo via GreySkiesBlue on Etsy}

#10 Best Friend Coffee Mugs! I now have best friends in three different states and being so far away sometimes it's nice to have something that makes them feel closer than a few hundred miles away. This gift is sold on Etsy (made to order!) but I'm sure that you could totally DIY because I've seen tutorials for things like this such as the Chalkboard Paint Coffee Mug from A Beautiful Mess Blog or the DIY Painted Mug Tutorial on My Crafty Spot and the Sharpie Art Mug from Whipperberry. If you're in need of inspiration for your design check out this Pinterest search I did.

{photo via Cynthia Shaffer}

#11 Cookies In A Tin! If you like baking and giving cookies as a gift to neighbors and church friends you might be interested in this project. Thrift stores have lots of old Christmas tins floating around most of the year, but especially around the holidays. Pick up a few, get some spray paint and start up-cycling them into something pretty to give your gifts in this year!

This item has already sold.
{photo via HuckleberryVintage on Etsy}

#12 Unique Wood Salt & Pepper Shakers! Awhile back, when I was feeling more crafty & creative, I took a set of old wood salt & pepper shakers, sanded them, painted them, sanded again and then glazed them to make my own set of vintage shakers. They were adorable and turned out so well! This is on the unique ideas list and you can totally find someone who has already done all the work for you if you're not up to making some yourself (just browse Etsy!). Here is a blue set via VintageChichiean I found while searching for options available.

{photo via Mr. & Mrs. Adams}

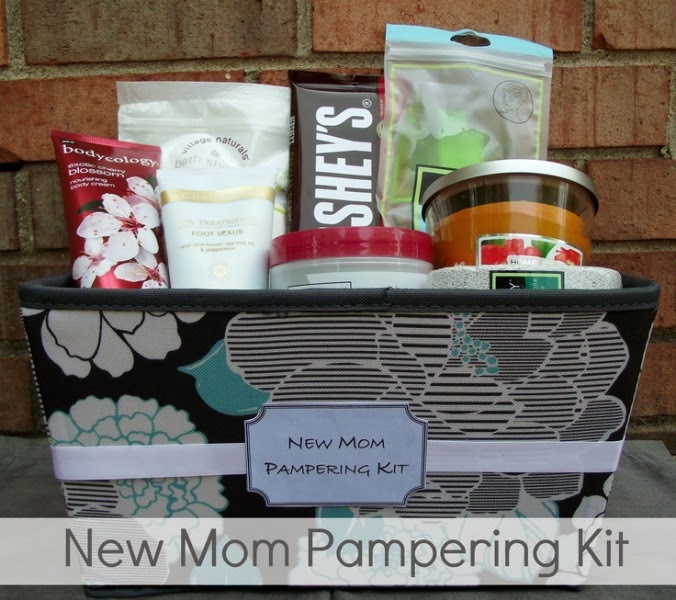
#13 Build A Pampering Kit! This idea is fun because you can do so many different things with it! Some things you might want to include: fun chocolates, cozy socks, bath salts, candles, magazines/books, hand creams/lotions, lip moisturizers, scented body wash, herbal tea packages, perfumes, pumice stones...or anything else the girl(s) on your list might enjoy! Check out some other themed basket ideas such as a baking kit, car washing kit, and the movie time kit all of which are found at The Lady Wolf.

{photo via Pinterest}

#14 Random Plates! Strange as this gift may sound, there are several uses for beautiful random plates. If you're a thrift shopper I'm sure you come across many random plates on the shelves in the home section of the store. This is a gift you'd have to give to someone you know really well, or to someone who already has a plate collection going on. Some people might use plates as decor in their home (as shown in the photo) or if you know a food blogger you could always give them different solid color plates & uniquely shaped dishes for them to photograph their creations on. (I know I would love a fun collection of different solid colored dishes to spice up my food photos!)

{photo via Simply Kierste}

#15 Family Name Sign! If your shopping for multiple families, or just want to do a single gift for a family, a family name sign is both pretty & practical. There are TONS of ideas on Pinterest for family name signs (just do a general search and you'll find plenty) and then of course there are Etsy shops who offer to make these for you so you don't have to mess with the work. One such store is MagnoliaMommyMade who custom makes and frames a beautiful sign, click link to view. Another Etsy shop which does the wood signs is SugarCreekLane. The wood blocks in the photo just above is probably one of the most unique 'signs' I've seen yet and is a DIY tutorial.

{How To: Gift Wrap A Box by Blue Eyed Beauty Blog}

As a bonus, of sorts, I'm going to include the photo tutorial for how to gift wrap presents which I wrote last year. I love wrapping boxes because they are the easiest, but you could easily use this tutorial for things that aren't in boxes and still end up with a decently wrapped gift. Enjoy!


As you can see, I have lots of ideas! I could probably keep going, but didn't want this post to be overwhelmingly long so I will stop with these things here. Thank you for reading through and don't forget to leave your comment to the question below!

What are unique/different gift ideas you like?

Monday, December 2, 2013

Best of Winter 2012

Hi everyone! I thought I would put together a post highlighting the most popular posts from the blog last year. I originally thought I would post this on the first day of Winter, but that won't be until December 21st and many of these posts share things you might want to try before then. The great hits from last year include gifts, foods, and things from my Winter Bucket List. (I shared a few other posts, recipes mostly, from last year which would also make great winter foods.) I've debated on whether or not I want to put together a winter bucket list for this year, but I'm thinking I probably won't. There are some things I want to do such as get a real Christmas Tree and go to the same Christmas Parade where Autry proposed to me, but other than that I don't have a lot of winter plans. I mostly just want to get through these last weeks of pregnancy and then have my little boy in my arms. That will be a plenty big project in itself I think!

Top posts from last winter!
{Click on photos or text links to view the post}


http://blueeyedbeautyblogg.blogspot.com/2012/12/im-engaged.html
I'm Engaged!! {Click photo to read post}


2012 WINTER RECIPES

DESSERTS


SIDES


DRINKS


BREAKFAST


SOUPS & MEALS


There were many things I didn't get to post last year that I'd love to post eventually. I have a few that I know for sure I'll be sharing with you. I am not doing much interesting in the way of gifts or foods this year, but if I do I'll be sure to share!