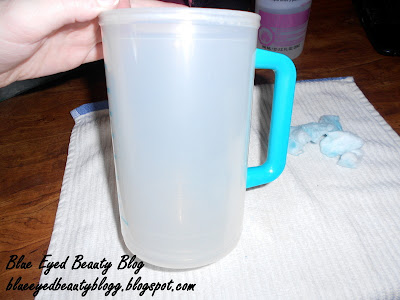
Thrift stores have plenty of these well insulated water jugs, but I always avoided them because of the hospital writing all over them! Well, not after I figured out this trick I'm about to share with you! I'd like to have two ro three more of these, but for now I just have the one. I will warn you that this will take a lot of elbow grease, but it's totally worth it!!
What You Need
~a clean hospital 'jug'
~pure acetone, like for removing fake nails
~Lots of cotton balls!
~a towel to lay over the surface you use
Some Notes
This is what your Acetone should kind of look like. A friend gave this to me almost a year ago and at one point I almost threw it away because I didn't think it had any uses other than the obvious...now I'm SO glad I didn't because there are plenty of alternative uses for this stuff! As you can see I have a towel over the table and my jug/cup ready to start cleaning!
Here's what my hospital jug looked like before I 'refashioned' it.
Directions
Step 1: Soak a cotton ball with acetone and rub it all over the wording you want to remove. I wanted to keep the oz. label since I would be using this cup to help me measure my water throughout the day.
Step 2: After a few seconds to a minute start scrubbing at the wording with the cotton ball. It may take a bit before you notice anything coming off, but that's okay! Also, you may need to get more acetone if your cotton ball is dry. That's what is taking off the wording/logo.
Step 3: It's going to take A LOT of scrubbing to get everything off, so be patient with it. Also, check to be sure you didn't miss any little bits that may have been harder to scrub off.
Step 4: The first side is done! Start on the next side and repeat this process over. I used a total of 8 cotton balls to remove the logo from my jug.
That's it! Super short tutorial for something that takes so long to fix!! I promise you that it'll be worth it though!! These jugs are well insulated so when I pack mine with ice water it doesn't leave condensation anywhere so I can set it on any surface without worrying about it, PLUS it has a super awesome lid which keeps it from spilling so it travels well too!
This Post Was Shared!


No comments:
Post a Comment
Thanks for stopping and leaving a comment! I LOVE reading comments! {They also help me know what you are interested in reading on my blog!}
Comments on posts older than 14 days are moderated. Other comments may be removed if they are inappropriate or spam. I do read all comments but can't always respond to each one because I don't get online very often.
My email can be found on my 'about me' page if you would like to contact me or you have a question.