


So wedding things can be really expensive...and if you're super crafty and creative like me then creating your own things for your dream wedding is totally up your alley. Thanks to Pinterest there are TONS of ideas floating out there for planning your wedding. Unfortunately many of those cute photos have no tutorials or even links for that matter... Due to this, I ended up creating a lot of my own things with the help of wonderfully inspirational photos and creative friends.

This beauty was created from...you'll never guess...a thrifted {and sort of vintage} curtain, pearl beads, and thrifted ribbon. I really loved how it turned out and it was MUCH easier than I thought it would be. First let me show the inspiration photo before I give you the easy tutorial:
 |
| {photo via Pinterest} |
Alrighty! Now we're ready to go.
First gather the things listed below:
What You Need
An old lace curtain
Elastic
Ribbon
Pearl beads
Safety pin
Instructions
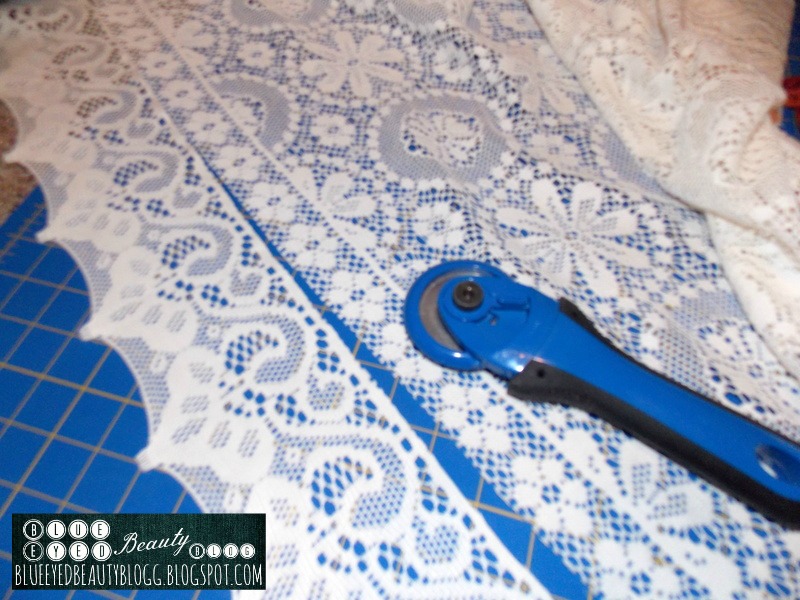
1. Lay the lace out flat. Choose the section you will be using for your garter. Cut a straight long line. You want it to be about double the width of your thigh.

2. Cut yourself a piece of elastic. Honestly it's better to cut it a little long in the beginning and trim it off later than to cut it too short {like I did originally}.

3. So now lay the elastic out over the lace and fold over the edge to see where you need to pin and sew. Make sure you pin and sew the correct side of the lace.

4. Now you have the perfect casing for the elastic.

5. Thread your elastic onto a safety pin and run it through the casing.

6. Now you will need to overlap the ends of the elastic and stitch together {very well} with zigzag stitches.
7. Pin the raw ends of the garter together and sew in place. Trim all excess strings.

8. If you really used curtain lace like I did you may find that trimming some of it gives a better effect. Notice the trimmed point on the bottom edge of the photo vs. the rest of the lace.

9. Time to trim ribbon! I cut mine at 15 inches which really worked out perfect so I suggest using that length for yours too. Here's a step by step for creating the perfect bow...

10. Start by making a loop.

11. Fold under the longer tail.

11. Create a space and then fold up the longer tail.

12. Fold down the long tab to create the second loop.

13. Fold one loop over the top of the other.

14. Tuck under the shortened loop.

15. And finish the bow off.

16. Sew the beads onto the bow and then sew the bow onto the garter. Make sure to center it where the sewn together split is centered in the BACK of the garter.
There you go. I do hope that you found this helpful!
Related Posts to the Wedding Topic
This Post Was Shared
I love this! Such a good idea!! Lately I've been thinking of what I want my wedding to be like and how I want it (even though I haven't meet the perfect guy yet). Please do more!!!
ReplyDeleteSara-Jayne xx
http://growingingodsimage.blogspot.com.au/
This turned out so pretty! I just recently made a garter as well. :)
ReplyDeleteHave a great weekend,
Kayla
Love Sparkle Pretty
Here I am again (now don't you dare delete my comment!! ;-)) to say how amazing I think this looks! And that you made this yourself, wow.
ReplyDeleteIt's so much more special since you made it yourself. Thank you for sharing with the Clever Chicks Blog Hop this week!
ReplyDeleteCheers,
Kathy Shea Mormino
The Chicken Chick
http://www.The-Chicken-Chick.com